
Language Classing
The eBECAS Classing module assists with the allocation of students into classes and the management of college timetabling. eBECAS supports two different types of programs, these are referred to as Language programs and RTO VET or Career programs. Language programs support enrollments that are based on continual class attendance, for specific hours per week and VET enrollments that are based on subjects studied for a period during the enrollment.
VET RTO and Language Classing enables administrators to allocate students to classes with specific teachers, rooms (including online virtual rooms), days and times. This enables students and teachers to see their timetable via the student and teacher portals. Teachers can use the teacher portal to mark attendance live, and enter Language tests and VET competencies using the portal via a computer tablet or smart phone.
Language Classing provides for progressive and changing class allocation for the period of the student’s enrollment based on the student’s program and changing Language level as they progress through their enrollment. Online classes can be created irrspective of location i.e. a class can have attendees from multiple locations.
A Language Class has Teachers, Rooms, days and times. Changing a student’s Class and level is usually based on the student’s results and testing. We store future and past class allocations.
You can enter and view the Students weekly results/assessments by Class.
You can enter the student’s absence by Class and session for the scheduled days and times specified for the class.
Language Class attendance is automatically calculated from the entered absences and the student’s course hours.
Language Classing – Faculties, Course/Programs, Sessions and Levels
Faculties
A faculty in eBECAS refers to a group of programs/courses. Each faculty must be defined as either a Language or VET type faculty. Every faculty should have specified the faculty holidays for all programs/courses in that faculty. Holiday weeks are entered starting on a Monday and finishing on a Friday. The Holiday week can be identified as extend or no extend. The extend option means that the length of the student’s course is increased to make up for the holiday period. e.g. If a course belongs to a faculty that has 2 weeks Christmas Vacation, and the 2 weeks are marked as extend, then the student who is studying over that period for a 10 week course, would have the end date 12 weeks after starting the 10 week course. Faculties and Faculty holidays can be found at eBECAS Main – Utilities – Faculties.
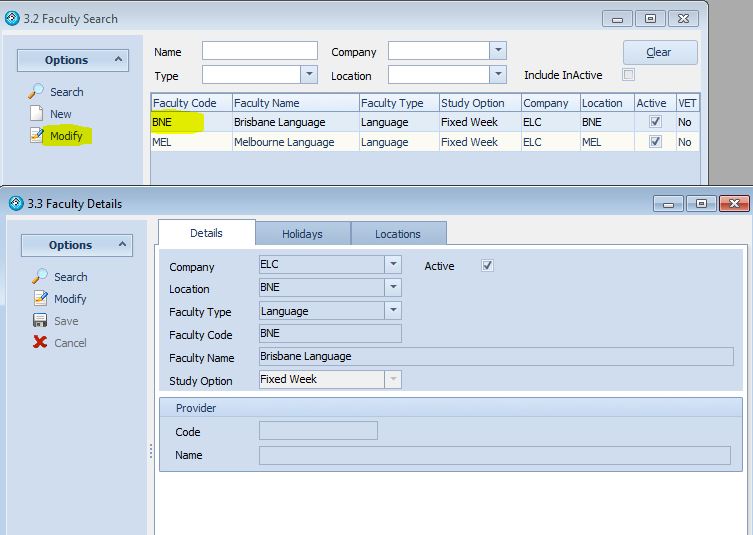
Navigate to the holidays tab to specify the holidays for that faculty.

Programs/Courses
Each course is created and associated with a particular faculty. This means that when a student offer course/program line item is added, the Monday start date of the week is specified and the length of the course is extended and includes the faculty holidays to calculate the Friday course end date. To see the programs/courses, go to eBECAS Main – Utilities – Programs.

Sessions
Each course will display the sessions that the student will need to attend. For example, for a full time General English course, the student is expected to attend a class during the CORE session and maybe an afternnon session. A shorter program may only have the Core session specified for class attendance.

Sessions names are setup by your College. Go to eBECAS Main – Utilities – Setup Configuration – Language – Sessions. You can display and use either up to 4 or 8 sessions. A session can be used to reflect a time period during the day and or what is studied during that time. In the setup demonstrated below, we have 4 sessions: Core, Evening, Options and Private. Alternatively a College may use AM, PM, Options and Private as sessions. A part time course may only have the AM session selected, and a full-time course could have the AM and PM sessions selected.
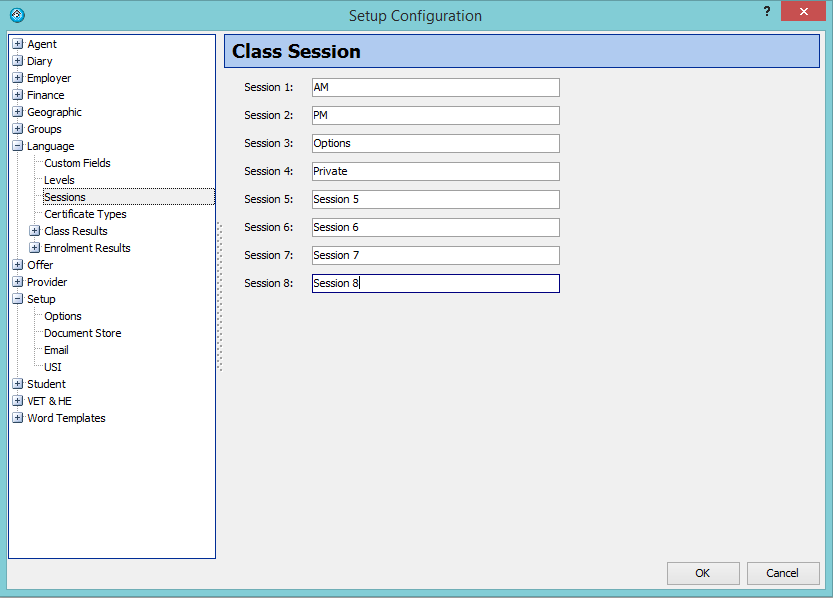
An alternate way to setup sessions is to use the sessions as an indication of what is taught in the class. For example the sessions could be named core, writing, reading, listening, speaking, options and activities.

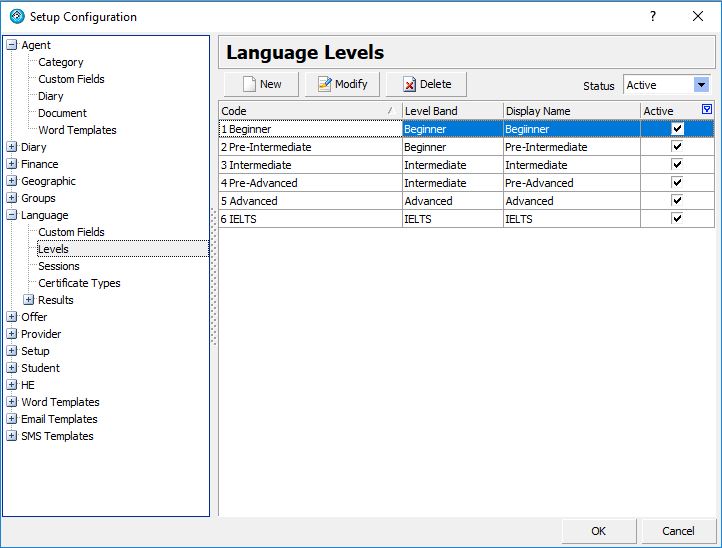
Language Levels
General English levels are used and assigned to classes and students. Staff may assign a general overall English level for students. This enables classing staff (mainly Director of Studies) to quickly find the appropriate Students for Class allocation by aligning the class level with the stduent level. English levels are setup by the College for example class levels may be defined as Beginner, Beginner-Intermediate, Intermediate, Intermediate-Advanced and Advanced. Alternatively, you can use a numbering system shown below. To tailor these levels for your College, go to eBECAS Main – Utilities – Setup Configuration – Language – Levels.
Class Allocation
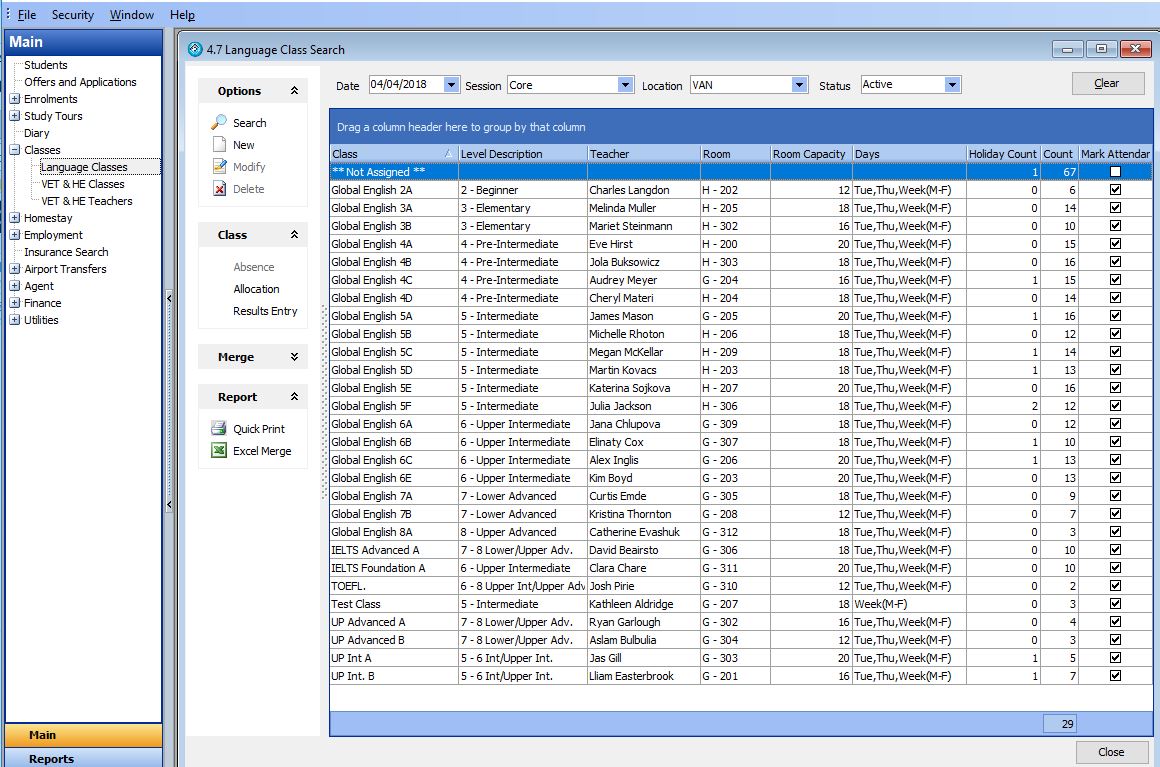
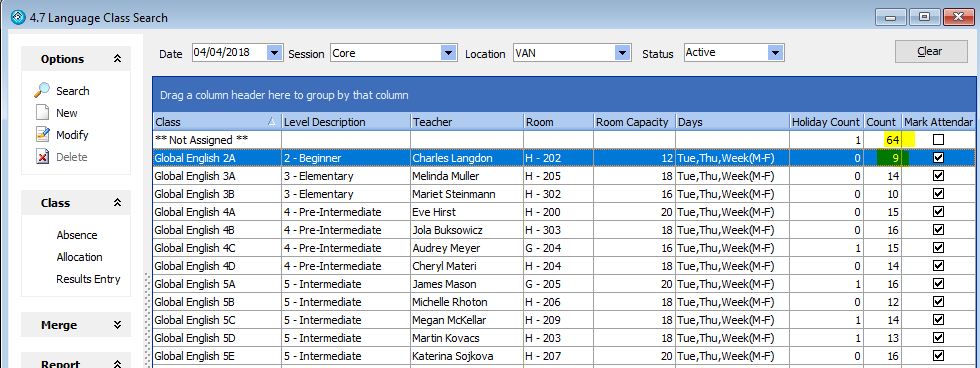
To view the allocation of current students to Language Classes for a session, go to eBECAS Main – Classes – Language Classes.
Classes details previously entered are displayed. The class details include the class code/name (the class code/name should not include the teachers name or reference the class level as they are already listed as separate fields), the class English level, the room, and teacher/s, the day or days, and the time from and to during those days. You can also see the total number of students allocated to each class and absentees for that week.
We also provide a line listed as **Not Assigned** which displays students that have not yet been allocated to a class for that session, but need to attend a class for that session (this is specified by the student studying a program/course which has the session marked).
From the above screen you can display the students in a class by selecting the class (such as Global English 3A) and selecting the option Class – Allocation.

Class assignment – Allocating ** Not Assigned ** Students to a class
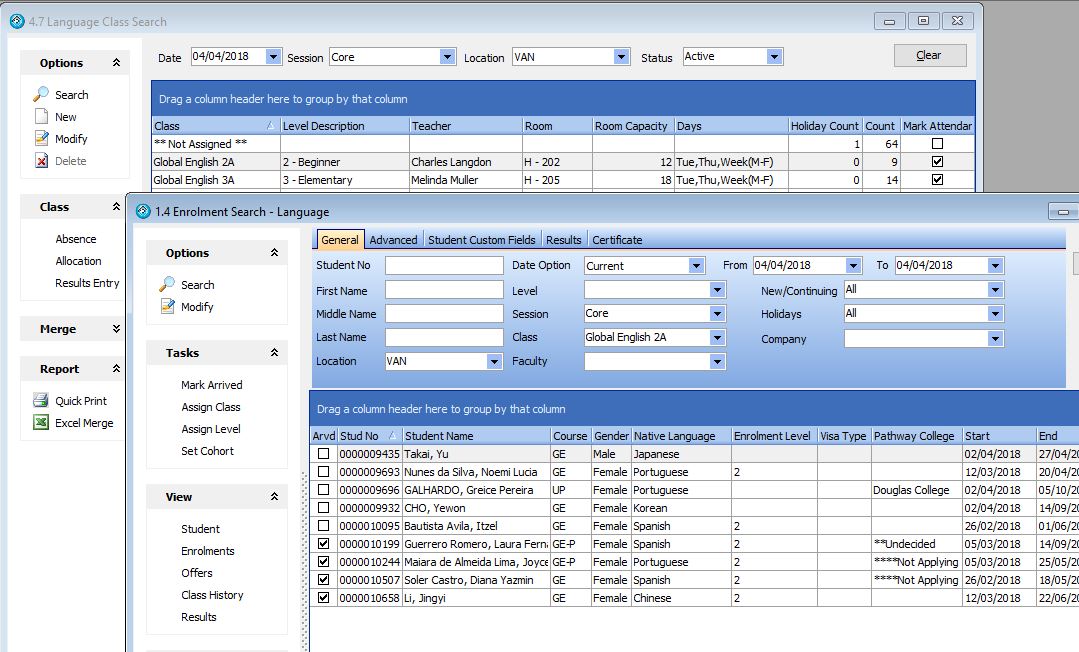
To allocate the ** Not Assigned ** students to a class, select the line ** Not Assigned ** and press the option Class – Allocation. You will see the details of students who are waiting to be placed in a class.

When you are ready to assign the student to a class, highlight the student/s

Then select Tasks – Assign Class, now highlight the class you want to place the student in and press Select.

If you press Search again on Screen 1.4 this will update the list and you will see that the student(s) have been removed from the **Not Assigned ** list. You can then go back to Screen 4.7, which displays the Classes. You will see the assigned number for each has been updated.
You can also highlight the class and display the students allocated to that class which will include any recently placed students.
Class assignment – moving student classes
If a student has already been allocated to a class and you want to change the class the student attends, go to the class the student is in and then assign them to a new class.
You can also highlight and select multiple students from one class to be assigned to a new class. Multi-select works the same way in all Microsoft Windows products do, hold down the alt key and then click on multiple students. I have selected 3 students to transfer below as an example.
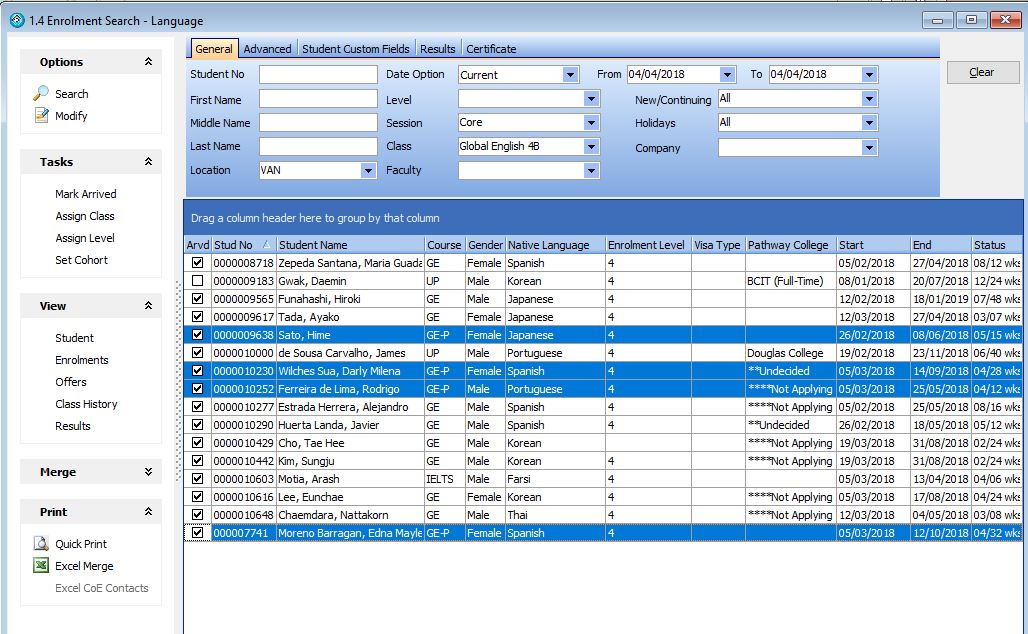
Now by pressing assign class you can transfer all 3 students at once.
Highlight and select the class and those students will be placed in the new class.

Each time a student is placed in a new class for a session, the class history is automatically updated.
If the Level changes for the Student it is suggested for those students you update the Level also, to make for easier future Class allocation.
Class Assignment – Assigning Students to a future class
eBECAS supports the option to pre-assign a class in the future, without affecting current class allocation.
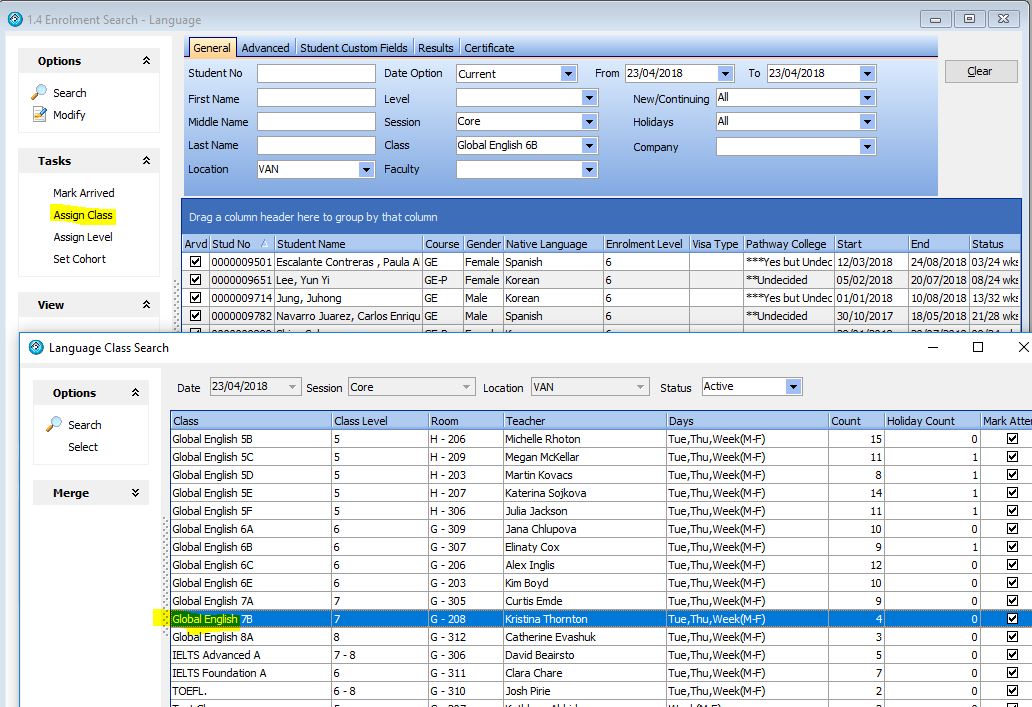
For example, a Director of Studies wants to move 2 students currently in the 6 – Upper Intermediate 6B class to be allocated to the 7 – Lower Advanced 7B class in 2 weeks.
Go to the Language Class Search, and change the search date to 2 weeks time e.g. April 23, 2018

Highlight the Class you want to move the students from and display the class allocation (press allocation), and select the students to move

Now select the class you want the students to be placed/assigned to and press Select:
Refreshing the Class allocation for April 23, 2018 for the screen Language Class Search shows the student are not allocated to the original class.
If you search the Language Class search for the current date you will see the students are still allocated to the Intermediate B Class:
Looking at the Student’s Class History you can also see the class history and pre-allocation:

Student Enrollment – Assigning classes by enrollment
The class a student is currently assigned and pre-allocated can be made by enrollment. Go to the Student Enrollment – Class tab to display the current, history and pre-allocations. IF you want to change a class highlight the class and press modify.
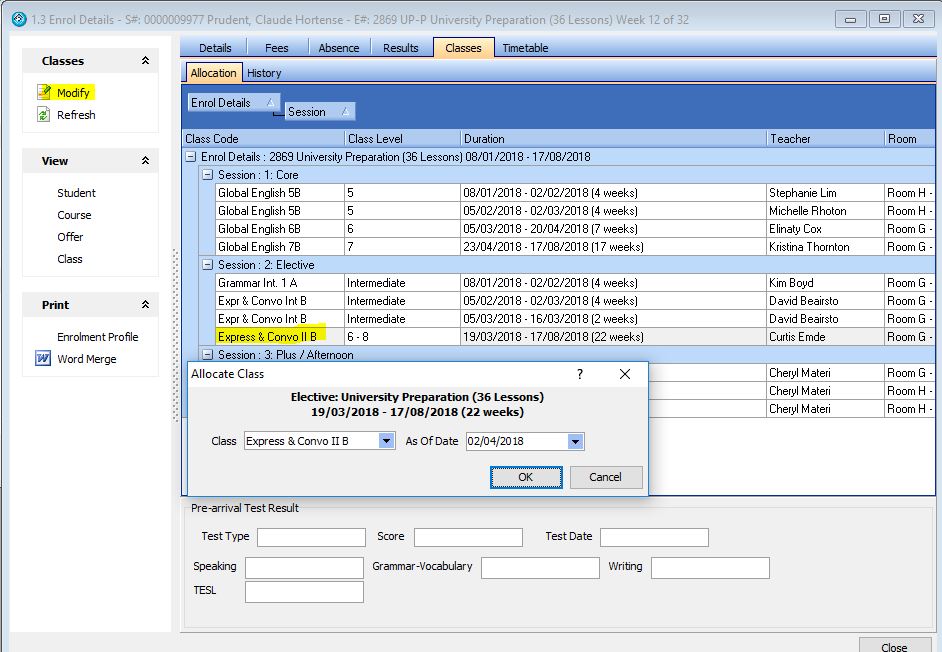
Press the class and a drop down list will appear. You can choose the class to shift the student to, and when the change is to take effect:

After pressing ok, the class allocation for the student enrollment looks like the screen below, and the class lists are updated.

Language Attendance Calculation and Absence entry
The building blocks for attendance need to be setup in eBECAS. The calculation is based on the course the student is studying. The enrollment lists the course and the course specifies the hours per week the student needs to be in attendance. To specify this, please go to eBECAS Main – Utilities – Course.

The number of hours attendance for a student is calculated using the number of attendance hours per week and the number of weeks in the student’s enrollment. In the above example, a student studying Global English has a total of 21 hours of attendance per week. In this example, if the student is studying a course for 10 weeks, then to receive 100% attendance the student needs to be in attendance for 10 x 21 hours = 210 hours.
Absences are entered in eBECAS and are used in the calculations for attendance. Colleges can print and mark attendance on class rolls, or Teachers can enter absence and results via the Teacher Portal.
Staff can enter the student’s absences by class for a week into eBECAS.
The absence entry in eBECAS and the Teacher Portal is formatted according to the Class days and times specified. To see the Class days and times highlight the Class and press Modify.
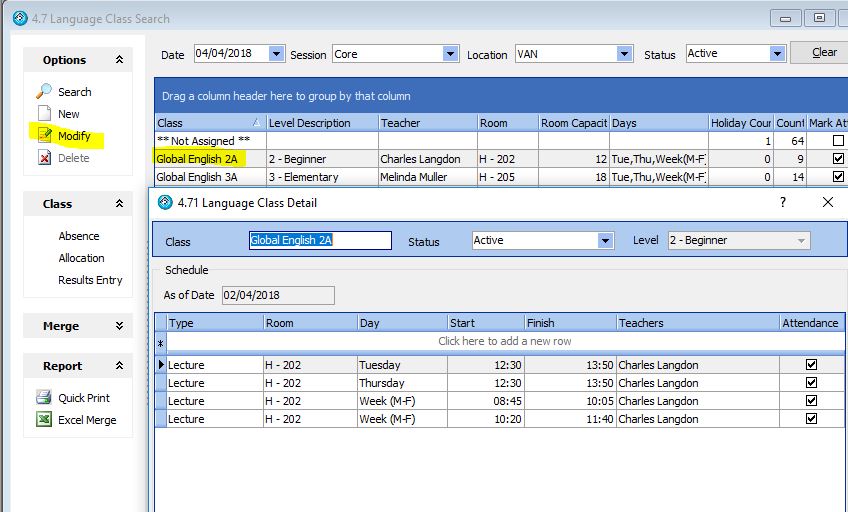
To enter the absences by Class for a week, the days and times will be displayed where you can mark the total time for the day period or enter a decimal hour.
To display the Class week absence entry, please go to eBECAS Main – Classes – Language Classes. Select the week (starting day as Monday), select the Session and Location and press search. The classes will be displayed. Highlight the Class and press the Class – Absence button on the left panel.
This will display the Language Class Absence Entry form, where absent hours can be entered for the students in that class.
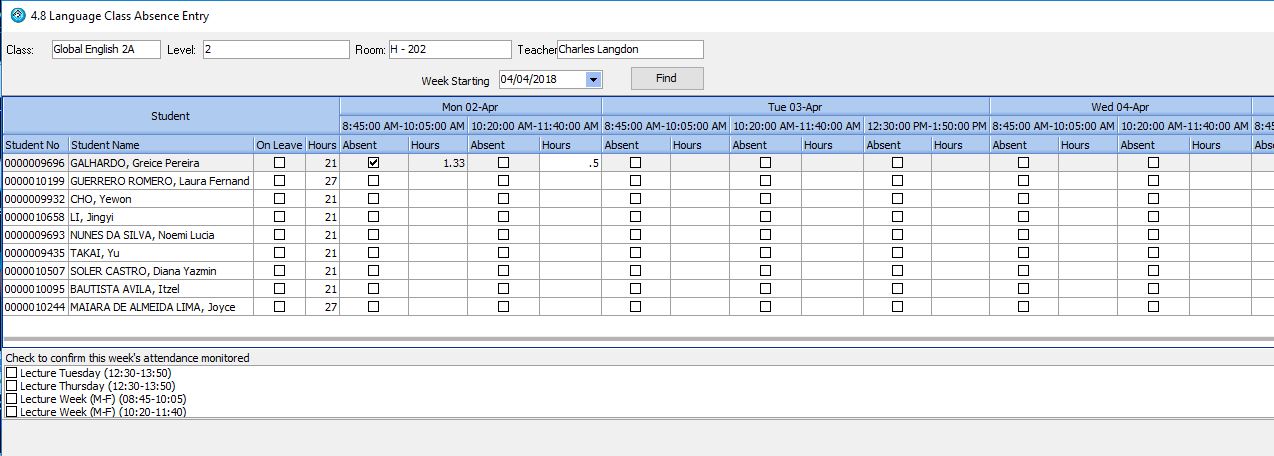
After the student absences have been entered, press OK to post the hours of absence to the student enrollment and update the students attendance calculation. You can check what has been entered by going into the student enrollment – absence details.
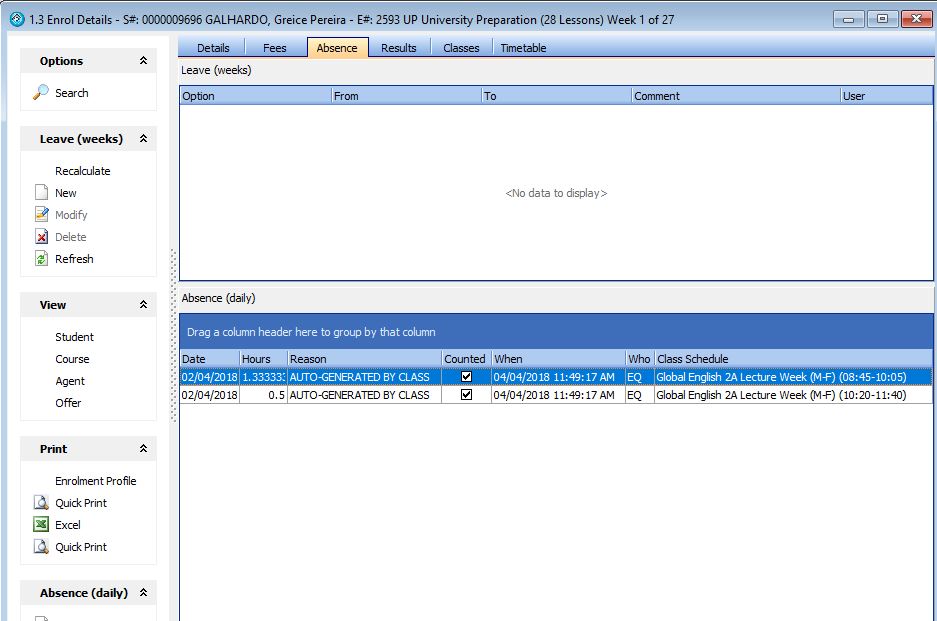
This shows that the hours of absence have been updated into the student enrollment details. Alternatively, absences can be entered enrollment by enrollment. This is certainly more of a tedious method but can be an option if the absence needs to be annotated or flagged.
Regardless of whether the absence is entered through the student enrollment or in bulk by class, attendance will always be recalculated and updated.
eBECAS calculates attendance two ways. The standard calculation is called overall attendance. The other attendance calculation is called current attendance. The current attendance should be used to provide an indication of what the overall attendances would be if the current level of attendance continues throughout the student’s course.
As an example of current and overall attendance percentage calculation – If a student is doing a 10 week course and was absent during the second week, then as of the end of week 2, the current attendance is 50% and the overall attendance is 90%.
Student and Teacher Portal display of Classes
The best and easiest way for a student to view their timetable is using the student portal. The student can see their class for each day with times. The Teacher can display their classes and enter absences online with comments, and enter class results and assessments.
Language Rolls
If you still want to use the old way – you can print a roll and mark the printed roll for student attendance. We have several reports and well as the option to create your own report from Ms Excel.
eBECAS Reports – Classes – Language – Class Roll (Attendance) The report options are:
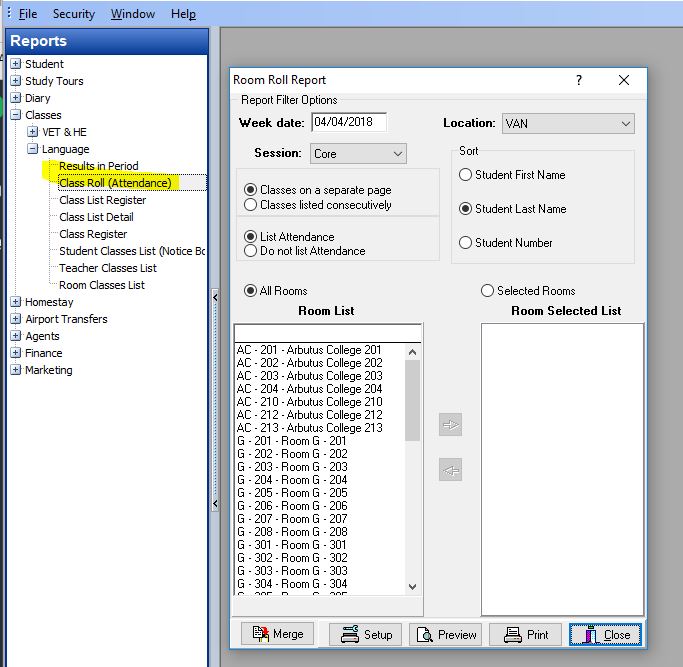
These option in preview display:

This report is designed to be annotated by the teacher in the classroom and collected at the end of the week. Following this, absences should be entered into eBECAS to update the attendance calculations.
So that students know what classes to attend for the different sessions, we have provided a Noticeboard Roll. To access this, please go to eBECAS Reports – Classes – language – Student Class List (Noticeboard). This report can also be exported to Ms Excel so you can edit and tailor the layout.
Language Rolls can be tailored and printed by mail merge from Language Class Search.
The Language Class Reports have been superseded by the Student Portal and Teacher Portal.