
The purpose of this page is to provide a general overview of the tasks that need to be completed to successfully setup USI (Universal Student Identifier) for your college.
USI Setup
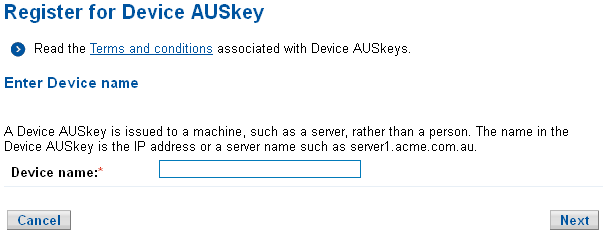
In order to validate a USI, you first need to download and install a DEVICE AUSkey if you haven’t done so already. During installation, make note of the values you enter as these will be used within eBECAS USI setup.
You will also need to know the password you use and location of the keystore.xml file. The keystore.xml file is automatically generated by the installer – the installation process prompts your for it’s location. Select a shared location that all users of eBECAS have access to as it needs to be accessible for each user every time they use the USI service.
Once you have finished installing the Device AUSkey, you need to go into eBECAS and set it up for USI use. This only needs to be done once as all other users will be able to use the same settings. To setup eBECAS, go to Utilities | Setup Configuration and under Setup there’s a USI menu option
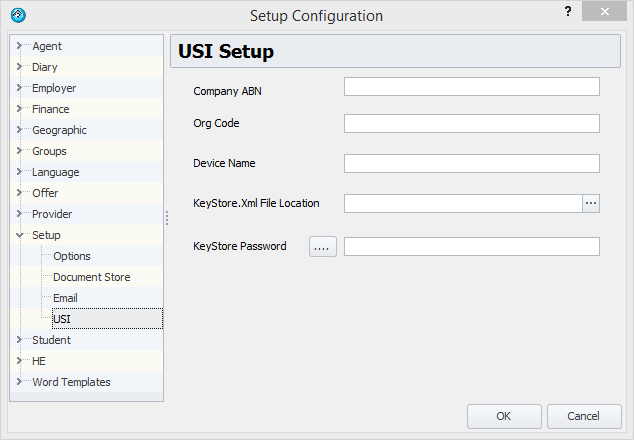
Please enter the same values you used during the Device AUSkey installation. To update and save click OK. As these values are rarely changed, and only read when the program starts, you will need to restart eBECAS to have the values ready for use. You can then use the USI features under VET & HE tab in eBECAS.