
Template access levels
Index
Online Classes can now be created with the ability to allocate students across multiple locations.
An online class needs the Teacher/s, days and times entered as well as identifying the class as online. You cannot modify an existing class to be online. You must create a new class and specify it as online, then shift students from one class to another. Please mark a class as inactive if not being used. Classes can be created with an end date which should coincide with review date of regular language levels and resource reviews.
You may create the class as being held in an “online virtual room”.
Generally we encourage all classes to have specified an end date which is ideally when the class teachers, student allocation and rooms are reviewed and re-allocated. We provide a class copy function to minimize effort in entering days and times for a newly created class. Attendance can be marked for the online class.
Creating and Online Virtual Room
Go to Main>>Utilities>>Rooms>>New

Mark Online and fill in Code, Name capacity and web url if you are using virtual communication software.
Creating an Online Class
Go to Main>>Classes>>Language Classes>>New
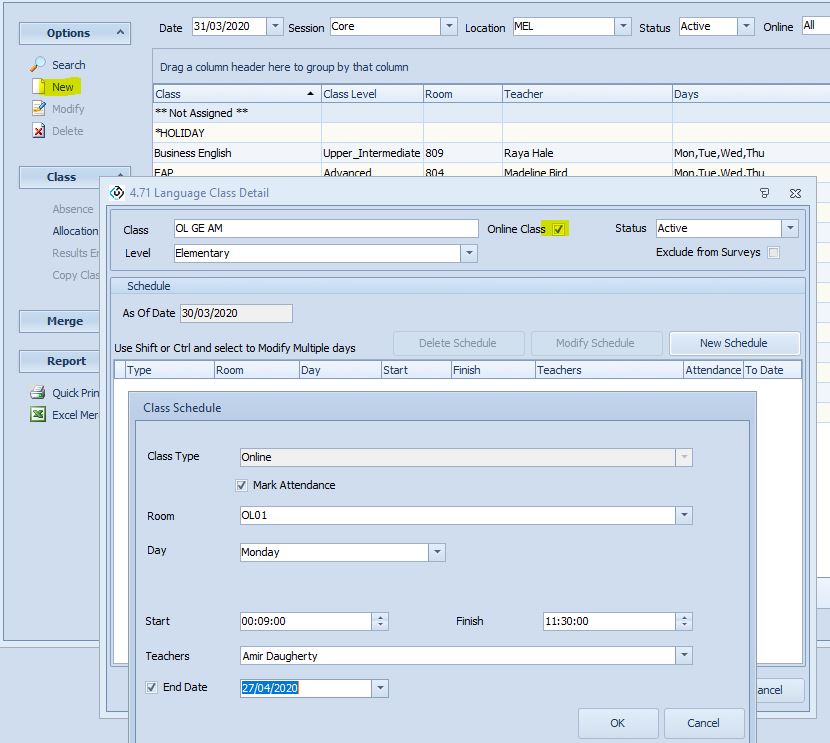
Populate the Class days and times (Monday-Friday) can be entered as one value selection. Please make sure that any breaks are shown.

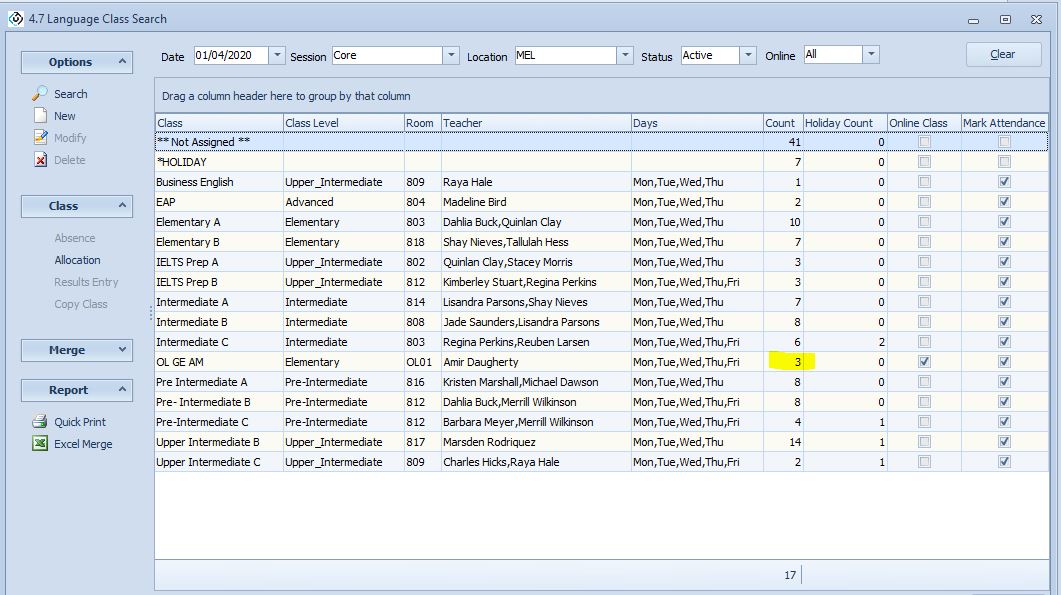
Class search display

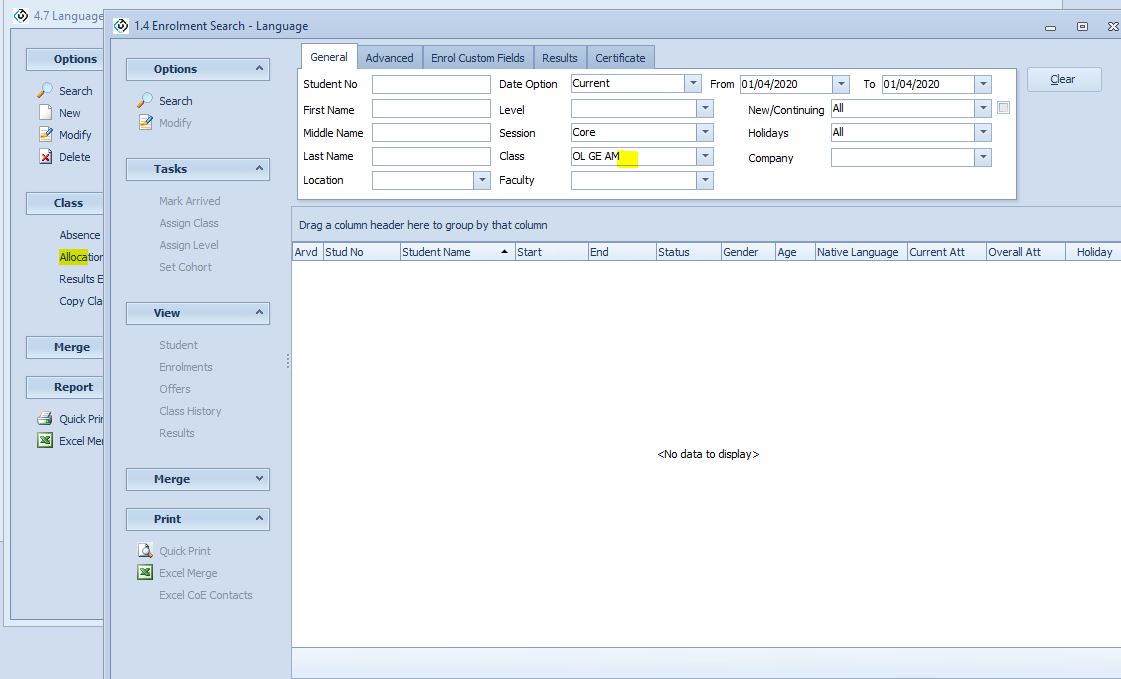
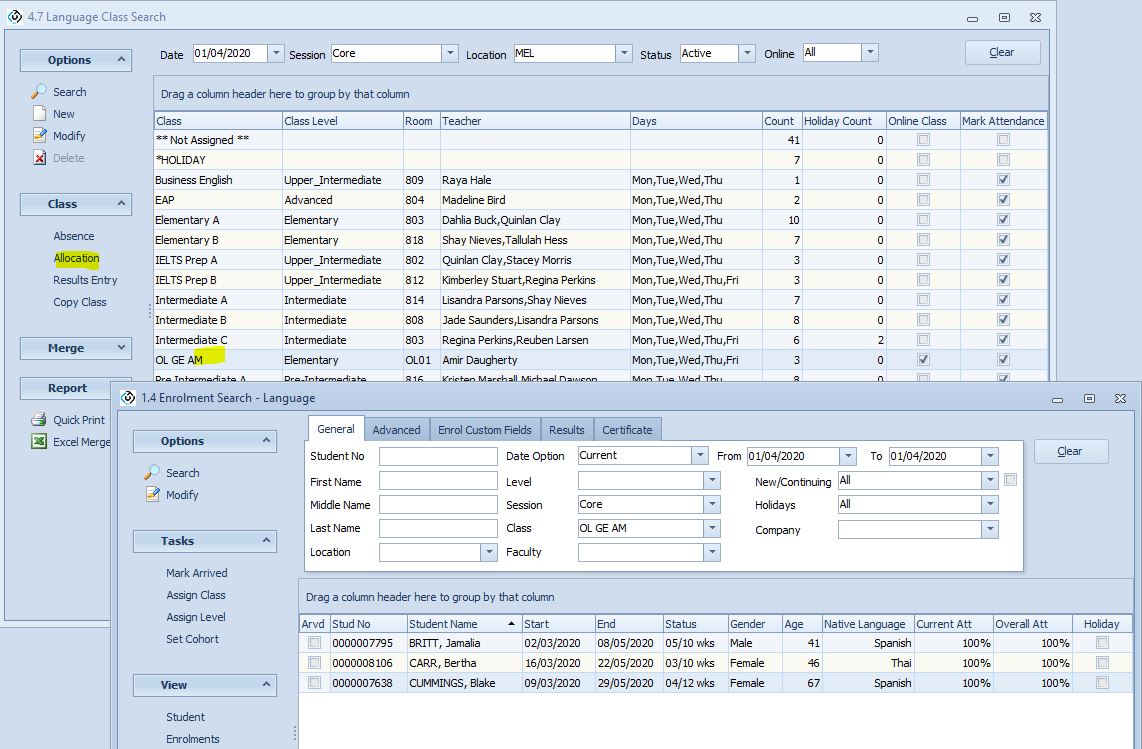
Allocating Students to Online Class
Select Allocate while highlighting the previously entered online class, which displays the current allocated students. As this class has just been created there are no students allocated yet.
Notice that the enrolment search is filtered to only display the current students allocated to the class. By selecting the class as **Not Assigned** you can see the students for all locations that need to be assigned to class. It is suggested that you display the columns Enrolment Level, age, native language and gender with maybe any pre-arrival student test results, to assist you in your online class allocation. To choose the columns available to display see here
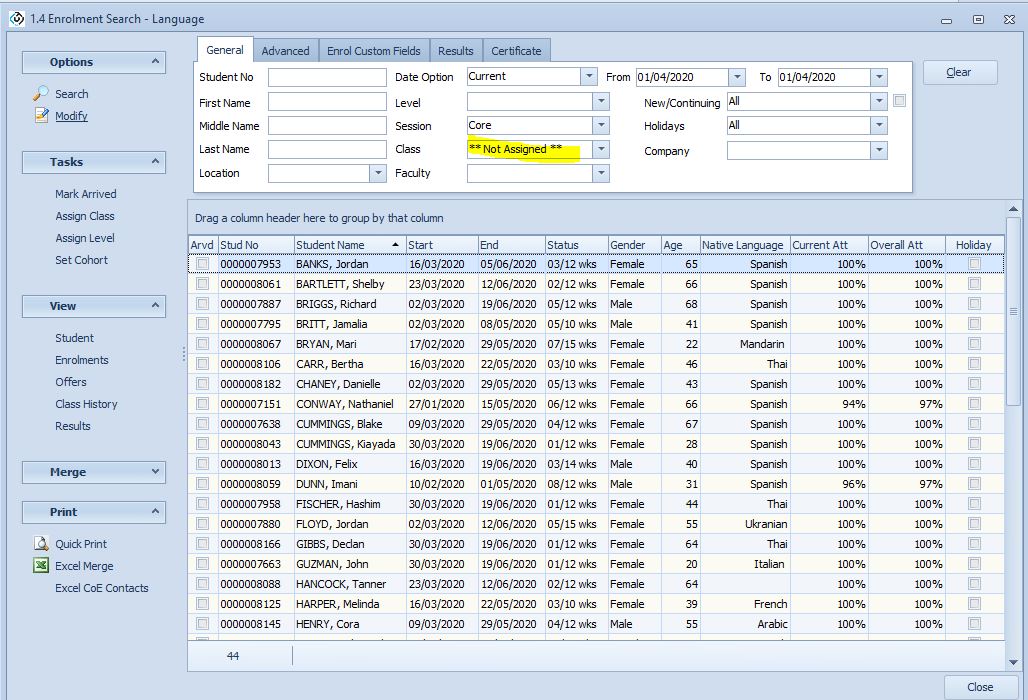
Individually select or multi-select the students you wish to assign to the Online Class, then press Assign, select the Class and then press select

Pressing Search again will show those stduents have been removed from the **Not Assigned** list
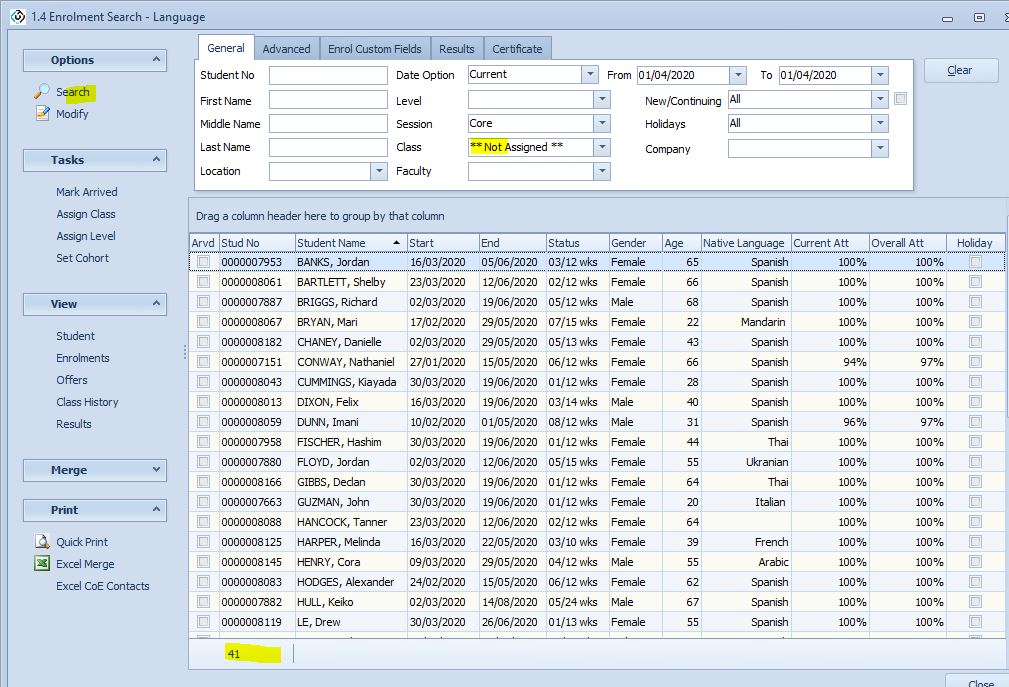
Moving back to the previous screen Language Class Search and updating the display by pressing Search displays the Online class with allocated student numbers
You can see the student allocated by highlighting the class name and pressing Allocation or pressing enter.
Similarly you can display and allocate students to online classes from the Language Class Allocation, where you can drag and drop students from one class to another while displaying the las results enter for the student enrolment and level.
